Understanding the Purpose and Effects of Blush, Bronzer, and Highlighter
Unveiling the Magic of Blush
Blush is not merely a touch of color; it’s an essential tool to create a lifelike vibrancy within the skin. Cream blushes, in particular, are revered for their ability to melt into the skin for a more natural look. When applied correctly, blush can make you appear revitalized and radiant as if you’ve just returned from a brisk walk on a chilly day. This natural look should be your blush-application goal, whether you’re seeking a subtle hint of color or a bold statement.
The Transformative Power of Bronzer
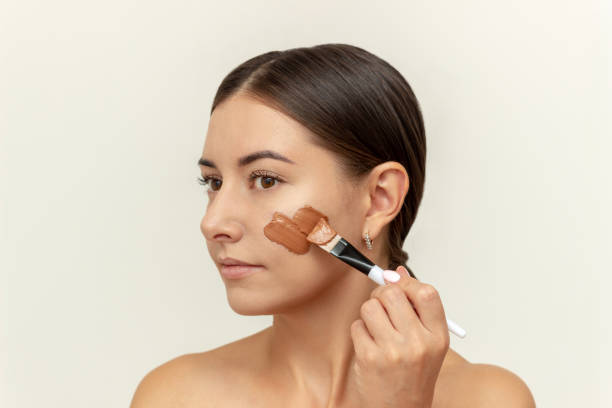
Bronzer, on the other hand, could go wrong if not applied with a light hand and strategic placement. Its primary role is to mimic a sun-kissed glow and add contour to the face, creating depth and angularity where needed. Makeup looks utilizing bronzer should go for the illusion that you’ve been lightly touched by the sun—not a noticeable shift in skin tone. Bronzer should be applied to areas where the sun naturally hits, such as the perimeter of your face, the cheekbones, and jawline.
Capturing Light with Highlighter
Then the highlighter steps in as the final flourish. It seems simple: apply highlighter to the areas you want to accentuate, such as the high points of your cheeks, down the bridge of the nose, and on the brow bones. Yet, highlighter tips usually emphasize the importance of blending—it’s this dance of light and shadow that carves out exquisite features and brings a sculpted sophistication to the face.
Pre-application Essentials: Prepping Your Canvas
Skin Type Considerations
Before breaking out your makeup products, consider your skin type, as this will greatly influence your choice between cream products and powder variants. Oily skin types might veer towards powder highlighters to avoid adding extra sheen, while drier skin may prefer cream highlighters that provide a dewy finish without clinging to dry patches. This pre-emptive thought ensures that the makeup not only looks good but also feels good and lasts longer.
The Importance of a Good Base
Creating a good base is a non-negotiable starting point for flawless makeup application. Always begin with a clean face, followed by moisturizer suited to your skin’s needs. Makeup tips often stress the importance of primer; this step should not be skipped if you’re aiming for long-lasting wear. Your primer acts as a smoothing agent, allowing subsequent makeup products to adhere better and blend more effortlessly.
Step-by-Step Guide to Blush Application
Choosing the Right Blush for Your Skin Tone
- Identify your skin’s undertone: warm, cool, or neutral.
- Select a blush tone that complements your undertone, along the lines of peach or coral for warm undertones, and rose or lilac for cool undertones.
Cream vs. Powder Blush
Once you’ve chosen a shade that suits your skin tone, deciding between cream and powder blush will be your next step. A quick makeup tip: cream blushes lend a dewiness that is great for drier or mature skin, while powder blushes can offer a more matte finish that works well for oily skin types. Remember, cream products should be applied before any powder to prevent them from caking.
Techniques for a Natural Blush Application
For a natural blush application, less is always more. Start with a small amount of product on your brush or fingers and build the intensity gradually. The key is blending, blending, and then blending some more until there are no harsh lines or streaks. Beauty gurus often remind us that makeup should mimic the natural flush of happiness or a slight embarrassment—a healthy glow rather than a conspicuous streak.
Brush Types and Strokes
Choosing the right brush is essential for proper application. For powders, use a fluffy, angled brush that allows for soft, diffused strokes. For cream blushes, you might opt for a stippling brush or your fingertips to gently dab and blend the product into your skin. Always apply the blush on the apples of your cheeks and softly sweep upward to the temples, keeping in mind the overall symmetry and balance of your face.
| Blush Type | Suitable Skin Type | Application Tool |
|---|---|---|
| Cream Blush | Dry, mature skin | Fingertips, sponge, or stippling brush |
| Powder Blush | Oily, combination | Fluffy, angled brush |
Bronzer Basics: How to Get a Sun-Kissed Glow
Identifying Your Ideal Bronzer Shade
Finding the right bronzer shade is not as daunting as it may seem. You’ll generally want to choose a shade that’s one or two shades darker than your natural skin tone. Avoid anything too orange or too dark, as this could go towards an unnatural, muddy appearance. The goal is a warm, natural look that seamlessly blends with your foundation.
Mastering the Art of Contouring with Bronzer
Contouring with bronzer is a transformative technique that requires balance and subtlety. Focus on areas you want to recede or define, such as the hollows of your cheeks, the sides of your nose, and the hairline. It should go without saying, then blending is the essential step in making sure your bronzer appears as a natural shadow rather than a streak on your face.
Contouring for Different Face Shapes
Contouring is not a one-size-fits-all approach; it varies depending on your unique face shape. For instance, a heart-shaped face might benefit from bronzer around the temples and hairline to soften the forehead. In contrast, square-shaped faces could go with contouring along the jawline and temples to round out sharp angles. Analyzing your face shape and then contouring appropriately can make a world of difference.
Highlighting 101: Illuminating Your Best Features
Selecting the Perfect Highlighter
When selecting a highlighter, consider your skin tone and the finish you desire. Is a pearly sheen or a golden glow more your style? Just as with blush and bronzer, highlighters come in cream and powder forms. Cream highlighters work wonders for creating a subtle radiance perfect for daytime wear, while powder highlighters often offer a more intense shine suitable for evenings out.
Liquid, Powder, and Balm Highlighters
As you become more acquainted with makeup products, you’ll discover liquid, powder, and balm highlighters each have their unique use cases. Liquids are ideal for a lit-from-within glow, while balms offer a more dewy effect, and powders provide a focused, shimmering highlight. The choice should align with both the look you’re aiming for and your skin’s needs.
Strategic Placement for Maximum Glow
When it comes to applying highlighter, strategic placement is key to achieving a radiant and lifting effect. Apply the product to areas that naturally catch the light—think along the cheekbones, brow bones, down the bridge of the nose, and on the cupid’s bow. Highlighter tips often recommend dabbing a little on the center of the eyelids and the inner corners of the eyes for an added sparkle.
Blending Techniques for Seamless Shine
Blending, again, is critical when it comes to highlighter. Whether you’re using a cream or a powder, seamless blending will ensure a natural transition where your highlighter melds with the rest of your skin. Makeup looks that feature poorly blended highlighter can disrupt the flow and appear artificial.
Pro Tips and Common Mistakes to Avoid
Do’s and Don’ts for Beginner and Advanced Users
- Always match your blush with the overall tone of your makeup—cool with cool, warm with warm.
- Don’t over-apply bronzer; it should enhance, not dominate, your makeup.
- Use the right tools for application—brushes make a significant difference in how products lay on the skin.
Troubleshooting: Fixing Over-Application and Other Mishaps
If you find yourself in a situation where you’ve applied too much of any product, don’t panic. There’s almost always a way to fix makeup mishaps. For overdone blush or bronzer, you can use a clean brush to blend out the excess or dab a small amount of foundation over it to tone it down. When it comes to too much highlighter, gently blot the area with a tissue and then blend with a sponge.
The Finishing Touch: Setting Your Look
Setting Products for Longevity
Once your blush, bronzer, and highlighter are flawlessly applied, it’s crucial to set your makeup to ensure it stays put all day. Translucent powder for oilier skin areas and setting sprays can shield your makeup from the elements and keep it looking fresh.
Final Touches for a Flawless Finish
A final once-over to ensure everything is blended and set should not be overlooked. Pay special attention to the edges of your makeup, as this is where demarcations can occur. Fix any smudges or streaks and then step back to admire your work—a harmoniously highlighted, contoured, and blushed masterpiece.
Conclusion: Enhancing Your Natural Beauty
By following this comprehensive guide on how to apply blush, bronzer, and highlighter, you’re now equipped with the know-how to enhance your natural beauty with confidence and skill. Remember, makeup is an art form, and while the steps provided are a framework, your personal touches will make each makeup look uniquely yours. Embrace these techniques to master the subtle interplay of light and shadow that defines a well-contoured face. Above all, the true beauty of makeup lies in its ability to boost your confidence, allowing your inner self to shine brightly through your artful exterior.
FAQ Section
FAQ 1: Can I use bronzer as a blush?
Yes, you can use bronzer as a blush for a monochromatic, sun-kissed look. Just be sure to pick a bronzer shade that complements your skin tone and apply it lightly to the apples of your cheeks.
FAQ 2: How do I know which highlighter shade is best for my skin tone?
Typically, if you have a fair to light complexion, look for highlighters with a pearl or champagne hue. For medium skin tones, golden or rose-gold shades are most flattering. Deep skin tones can opt for rich, bronze or gold highlighters that offer a radiant glow without appearing ashy.
FAQ 3: Is there a specific order I should follow when applying blush, bronzer, and highlighter?
Yes, the order generally recommended is foundation, concealer, bronzer, then blush, and finally, highlighter. This sequence allows for each product to blend seamlessly into the next, ensuring a cohesive and natural look.
FAQ 4: Should I match my blush shade to my lipstick?
While matching your blush to your lipstick can create a cohesive look, it’s not a strict rule. The key is to ensure that your makeup shades complement each other. If your lipstick is quite bold, a more subdued blush might be appropriate, and vice versa.
FAQ 5: How do I apply cream products without disrupting the makeup underneath?
To apply cream products over powder without disruption, use a patting or stippling motion instead of rubbing. Use a sponge or stipple brush to gently layer the product onto the skin. This method helps to maintain the integrity of the makeup underneath while building up coverage.